The next step is to assemble the defined unit cells. The assembly method depends on the choice of unit cell, but the following general steps apply:
Distribution of the unti cells is defined in a table named Structure Map which looks like Fig. 5.
For uniform structures, there is only one unit cell with a known ID, usually 1, which is distributed throughout the structure. The number of unit cells in different directions is used to create the Structure Map table and all cells (elements) are equal to that ID.
For non-uniform structures, a list of unit cells have already been defined (see Defining Unit Cells), and the Structure Map table is defined separately using the GUI or the API.
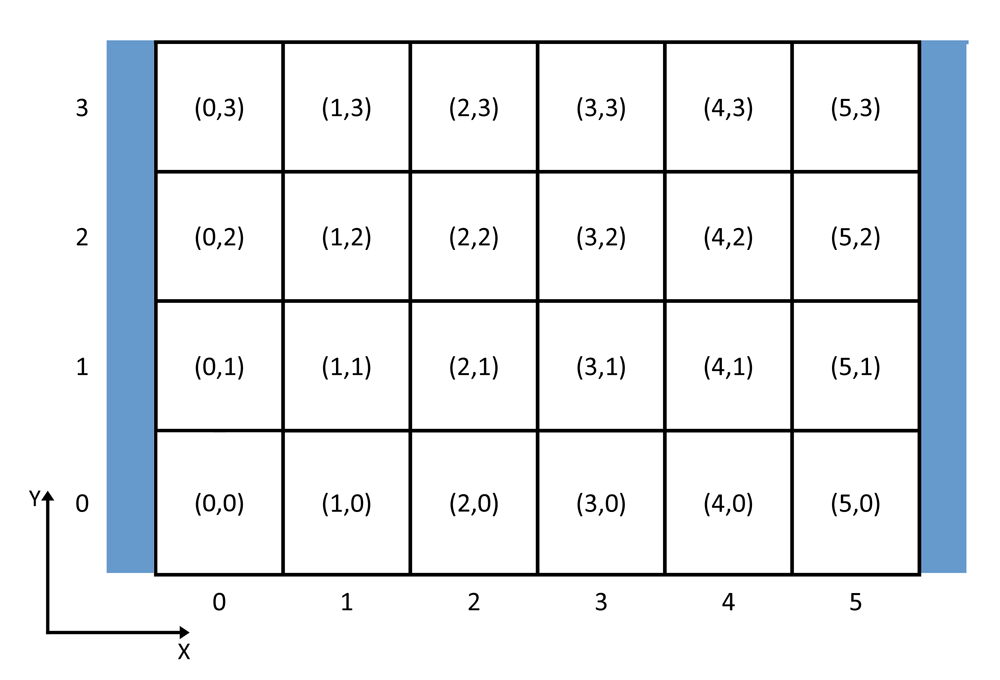
Fig. 5 Schematics of the Structure Map table for a structure loaded in the X-Direction. Zero-based numbering is used for rows and columns in accordance with the API. The blue vertical lines are loading ribbons.
Loading direction is defined and appropriate loading ribbons are created for the model. These can be seen in Fig. 5.
Unit cells are checked to have the same bounding box (heigth, width, and depth). and if they do, they are instantiated and translated to their locations.
Loading Ribbons are instantiated and translated to the appropriate locations.
The entire structure is merged and unnecessary parts are deleted.
It should be noted that if a solid structure is requested from a 2D structure, all the aforementioned parts are extruded by the defined Extrusion Depth which must be equal for all unit cells. This also applies to STL or STP export of a shell part.
After defining basic structure information, select the appropriate Loading Direction. The next step depends on the structure:
For uniform structures the Number of Unit Cells frame is acticated. These numbers are automatically converted into the table by the plugin.
For non-uniform structures, after selecting the Input Structure Parameters button the pop-up windows in Fig. 6 appears.
Fig. 6 Structure Parameters and Structure Map pop-up window for a non-uniform structure.
The top part is used for defining the unit cell parameters as explained in Defining Unit Cells.
The bottom part of this window has two spinners which determine how many unit cells must be present in the X and Y directions. Changing these resizes the structure map table. Afterwards, the table must be completed with IDs of the unit cells defined in the top section.
The mentioned options and parameters can also be specifed using the API. The first variable is pattern_params, which contains all patterning information.
First, the necessary libraries must be imported:
# Import the necessary libraries:frompyauxetic.classes.auxetic_structure_paramsimport*
Then, For a uniform structure:
# Define the PatternParams object.# Note that structure_map is set to None.pattern_params=PatternParams(pattern_mode='uniform',num_cell_repeat=(8,3),structure_map=None)
And for a non-uniform structure:
# Import numpy.importnumpyasnp#Define the structure_map similar to the figure.structure_map=np.array([[1,2,4,9,10,8,7,4,2,2],[1,2,4,9,10,8,1,4,2,2],[1,2,4,9,10,8,7,4,2,2],[1,2,4,9,10,8,7,4,2,2],])# Define the PatternParams object.# structure_map must be flipped and transposed because of the way# python iterates over it.# Note that num_cell_repeat is set to None.pattern_params=PatternParams(pattern_mode='nonuniform',num_cell_repeat=None,structure_map=np.fliplr(structure_map.T))
Also, loading direction must be defined using the loading_params object. For example:
# Define the LoadingParams object.loading_params=LoadingParams(type='disp',direction='x',data=20.0)# If only modeling is being performed, the direction attribute is enough,# but this is not recommended.loading_params=LoadingParams(direction='x')